How to Use Node.js to Read + Write To Google Sheets
Hi, this post will detail how to read and write data using a Node.js script to and from a Google Sheets spreadsheet. I'll take you through the step-by-step process. Let's get started.
This tutorial will follow some guides that are already available but I'm going to expand on the smaller details that got me hung up when going through this process. I also have a YouTube video that goes through this process but this blog post is a more up-to-date guide (as of Sept 2022) accounting for some updates in Google's tutorials.
1. Set up your Google Cloud Platform project
We're going to first start off by following the "Node.js Quick Start" tutorial straight from the source: Google. Go through the prereqs:
1.1 Installing Node and npm. I'm going to assume you already have that completed. Also, I'm going to assume that you have a Google account.
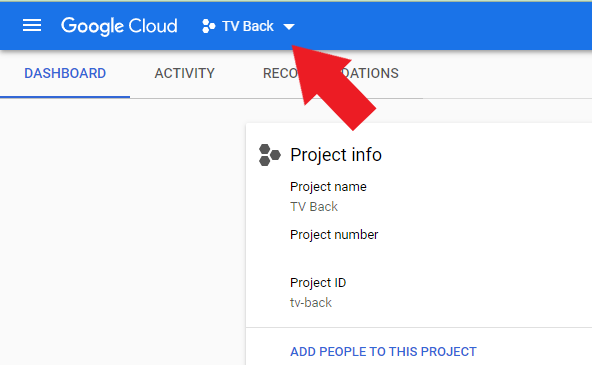
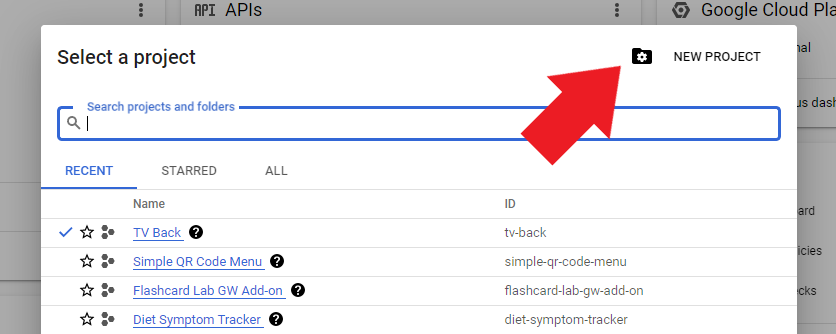
1.2 Then, you'll need to create a Google Cloud Platform project and enable the Google Sheets API. To do that, head over to the Google Cloud Platform page and follow these screenshots:
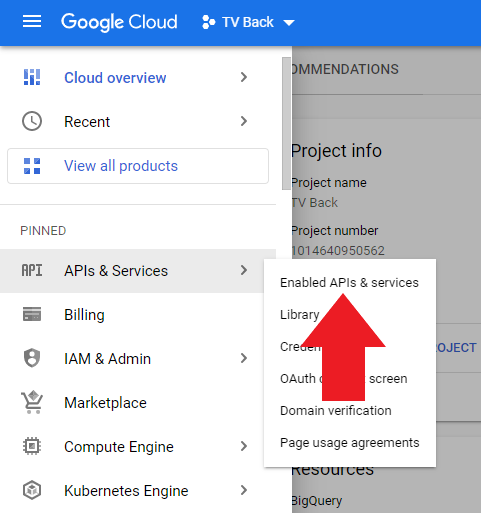
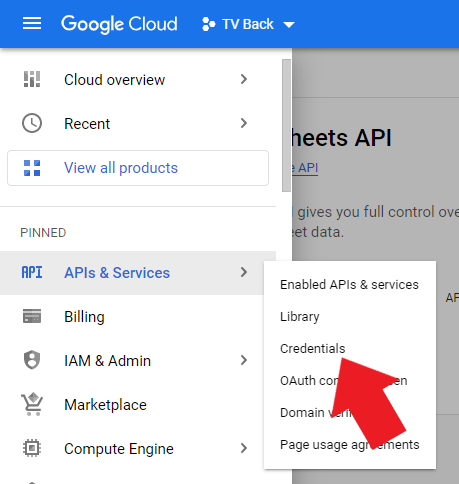
Now that you've created a project, you need to enable the Google Sheets API by going to the drawer menu:
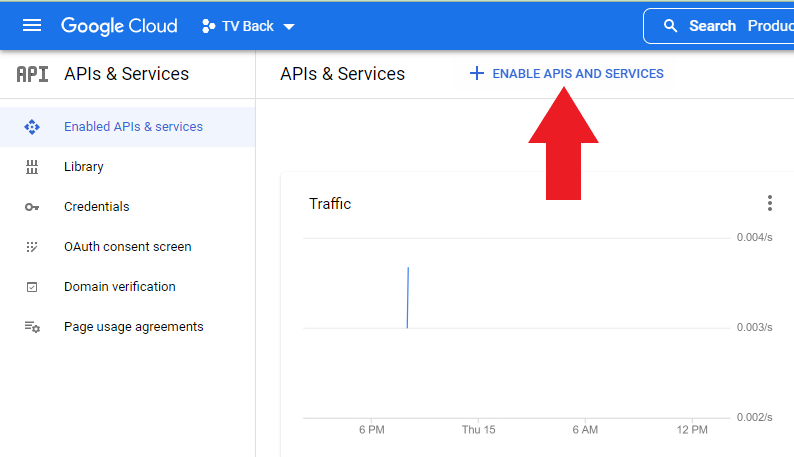
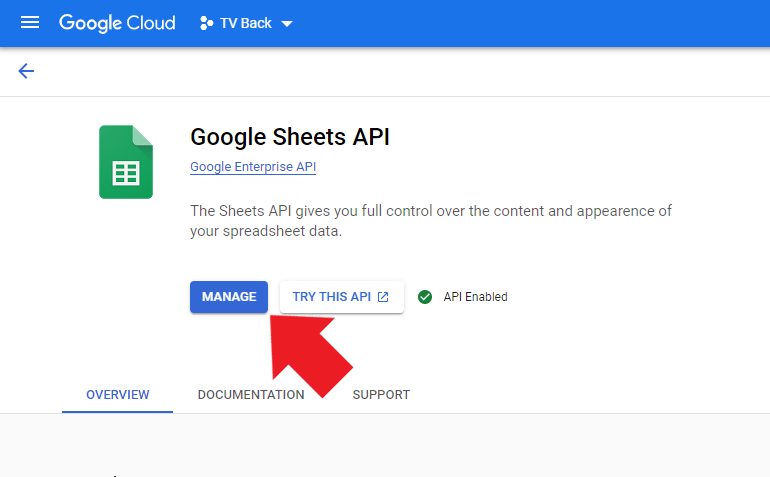
In the search bar, search for Google Sheets API. Once you find that API, click enable. I already have mine enabled so the button says "Manage". You will see a button that says "Enable".
1.3 Now, you will need to create authorization credentials for your application. This process will work for an app running Node that exists on your local server or on a remote instance like AWS EC2 or DigitalOcean. To do so, click on the "Credentials" tab in your Google Cloud Console:
Click "Create Credentials".
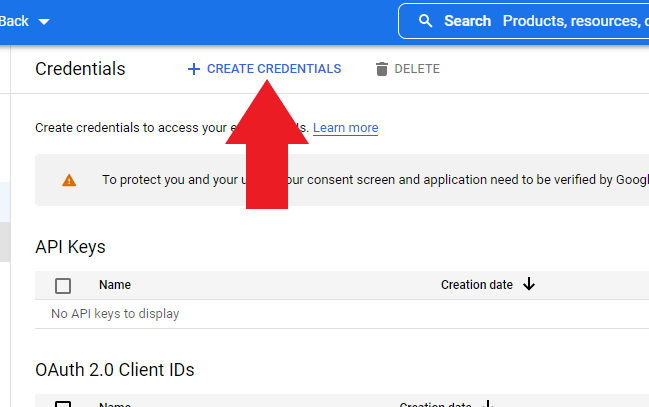
And select "Oauth Client ID".
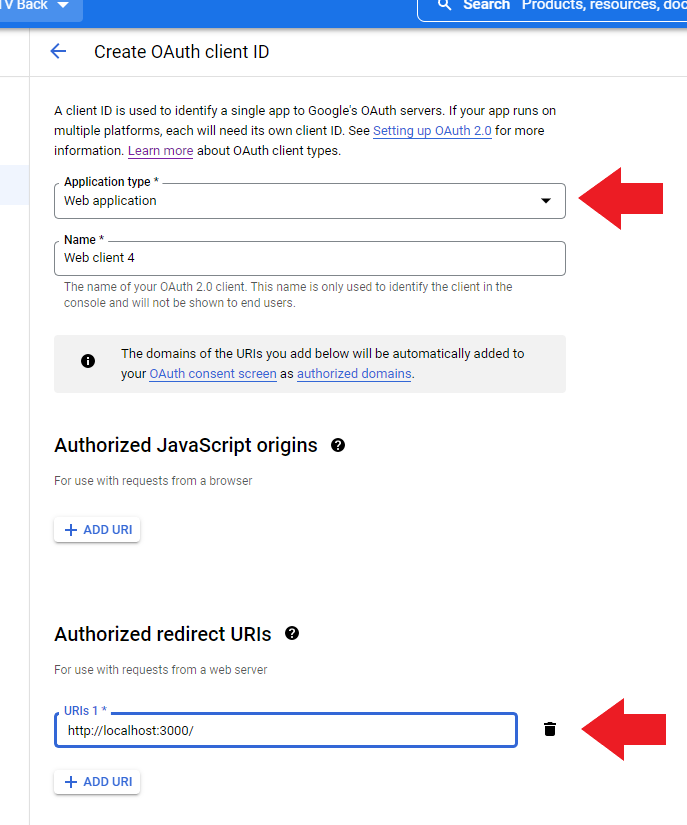
For the application type select "Web application" and in the "Authorized redirect URIs" section, you will need to input a URI that you have access to. This could be a local server (i.e. https://localhost:3000/) or Heroku page, or your domain URL. This will be important in getting a token.json file that authorizes your Node app to read and write to your Google Sheet. For development purposes, I'll be using https://localhost:3000/.
Once that is done, click "Create" and you should see your new Oauth 2.0 client ID on the credentials page.
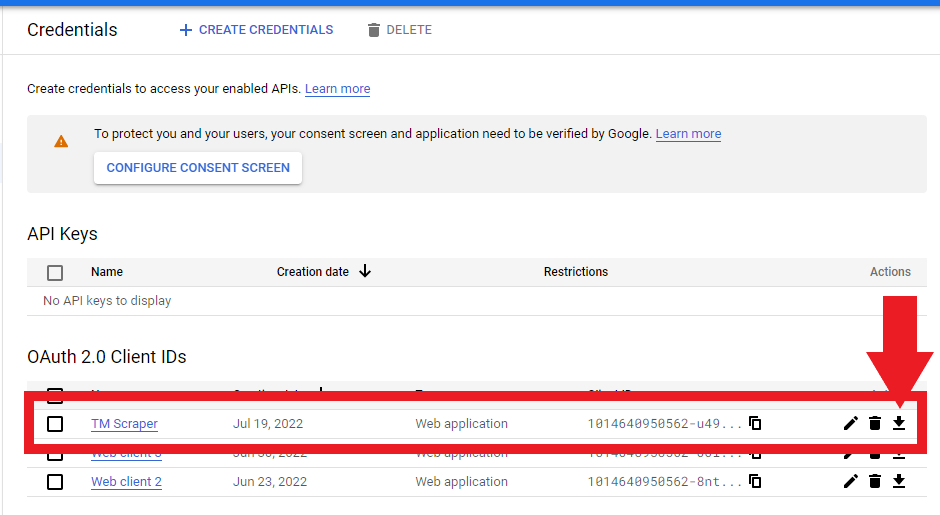
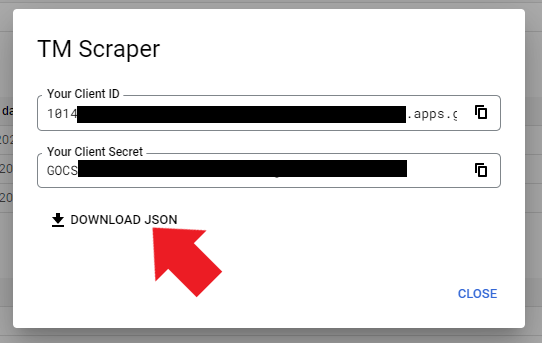
What you want to do now is to download the Oauth Client json file. Click on the download button and save the json file in a directory where your Node app will be located. Name it "credentials.json".
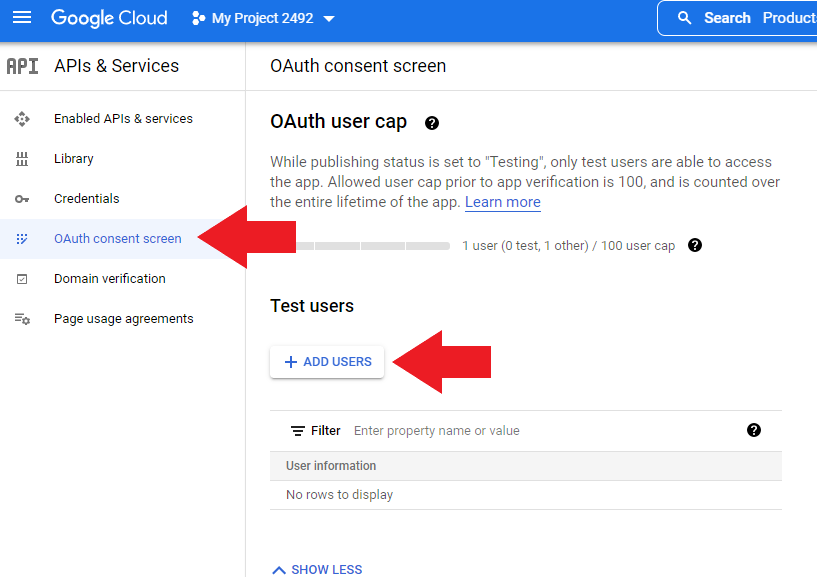
1.4 Finally, you need to give your Google account access to this app. Go to "Oauth Consent Screen" in your Google Cloud Console and "Add Users".
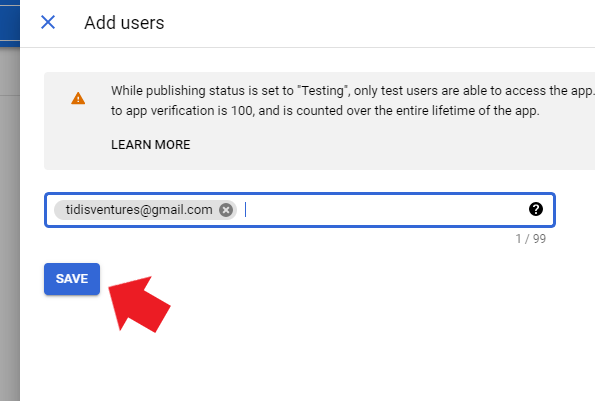
In the "Add Users" section, add the Google account email address that you will allow access for the app. I believe if you want to make this app a public app available to anyone, you will have to go through an approval process with Google (see my tutorial on that here). Since this is only for development, I've only added one user which is associated with my Google account.
2. Develop the Node.js script to read from a Google Sheet file
We're going to continue following the "Node.js Quick Start" tutorial.
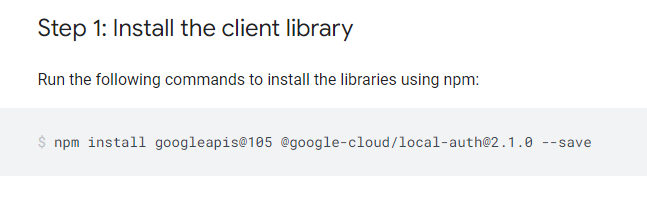
2.1 Install the necessary Google packages at step 1.
2.2 Then, create a new js file named index.js in your directory where you saved your credentials.json file and copy and paste the code in step 2 into that file.
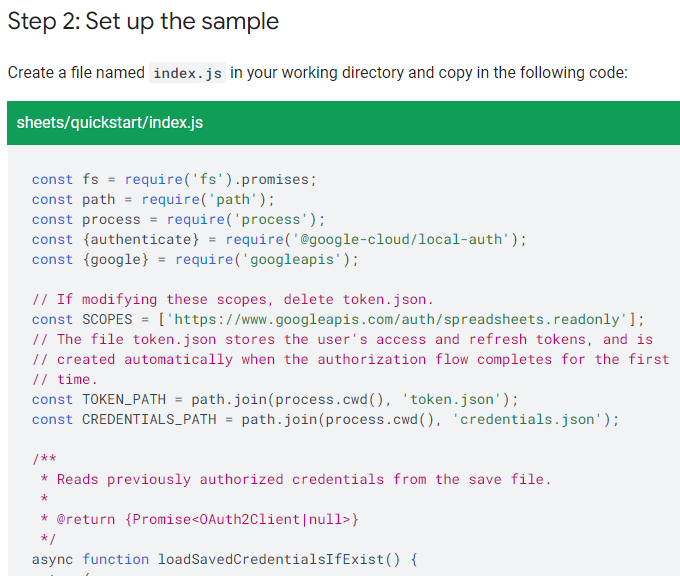
Important: One edit you need to make is to change the "SCOPES" variable from "https://www.googleapis.com/auth/spreadsheets.readonly" to "https://www.googleapis.com/auth/spreadsheets" to accommodate for reading and writing to your Google Sheets.
2.3 Save the file and run the file in your terminal command window by typing "node ." Because this is your first time running the app, you don't have the necessary token.js file that is required to read from the Google Sheets file. So, you'll be prompted in your browser to authorize access with your Google account.
In the browser, you will be prompted to sign into your Google account. Use the one associated with your email in the "Oauth Consent Screen" step (step 1.4).
Because you are in development, you should see an Oauth consent screen like this:
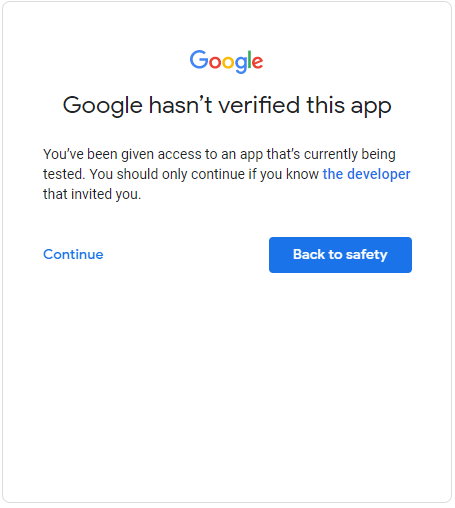
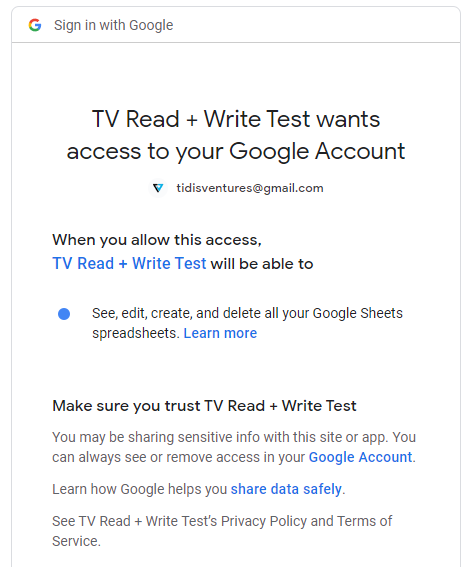
Go ahead and click "Continue" and authorize the access to your account. You should see something like this as your consent screen:
If successful, you should see some text saying "Authentication successful! Please return to the console.". Now, you can close that browser tab and navigate back to your terminal.
2.4 If everything was done correctly, you will see some dummy data being returned from running your script.
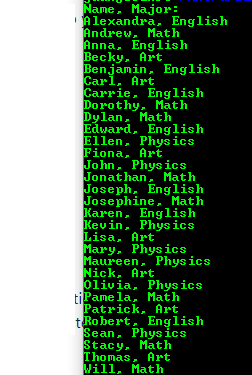
It's just shows a fake list of student names paired with their college major. Congrats! You have successfully read data from a Google Sheet.
Notice that in your directory, you now have a token.json file. This allows your app to access the Google Sheet without authorization each time now.
3. Writing to a Google Sheet with Node.js
For this last part of writing to a Google Sheet with your Node app, I'll refer you to this blog post from Daily Dev Tips. Specifically, copy and paste the "writeData" function code into your script.
Then, replace "listMajors" in the "authorize" function call with "writeData". So the code will change from

to

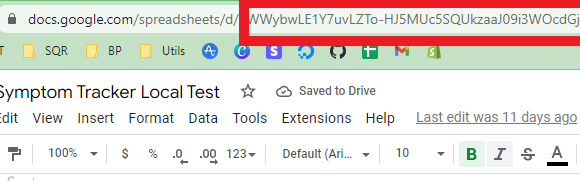
Also, you will need to replace the "spreadsheetId" value with the spreadsheet ID of a Google Sheet that your account owns. It's the long string of characters and numbers in the file URL after the "d/":
Finally, change the "range" value to "Sheet1!A1". Save your Node script and then run it in your terminal using "node .".
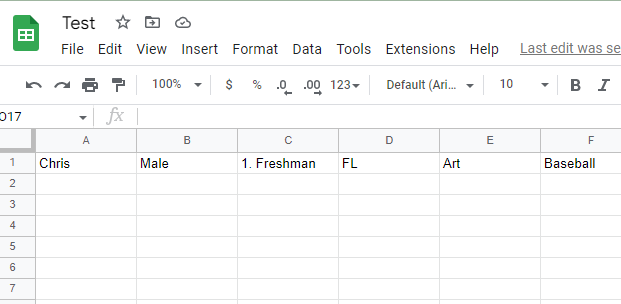
You should see data populated in the A1 to F1 range of your Google Sheet file.
And that's it. Now you can read and write data from a Google Spreadsheet. I hope this guide has helped you. If it did, let me know on social media by messaging me on YouTube. Thanks.